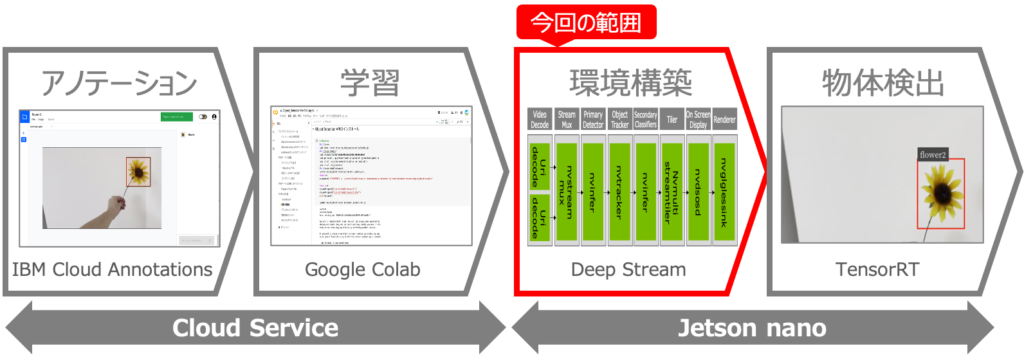
はじめに オリジナルモデルを使った物体検出をJetson nanoで行うべく、以下を実現しようとしています。
これを実現するために、5回に分けて記事を記載予定で、今回は4つ目の記事です。
第1回:IBM Cloud Annotationsを用いたアノテーション 第2回:Google Colabを用いたモデルの学習 第3回:Jetson nanoの環境構築 第4回:DeepStreamアプリを使いこなす ←この記事第5回:学習モデルの変換と物体検出
第4回:DeepStreamアプリを使いこなす 前回は、Jetson nanoにJetPackを使ってOSをインストールし、DeepStreamを動作させる環境を準備しました。今回は、DeepStreamのアプリケーションであるdeepstream-appを使えるようにします。さらに、出力形式を動画ファイルやネットワーク経由で送る方法や、入力をカメラにする方法などdeepstream-appの様々な使い方をご紹介します。
カメラの設定 まずは、DeepStreamアプリを使う前に、Jetson nanoにカメラを接続して、カメラの動作確認をします。
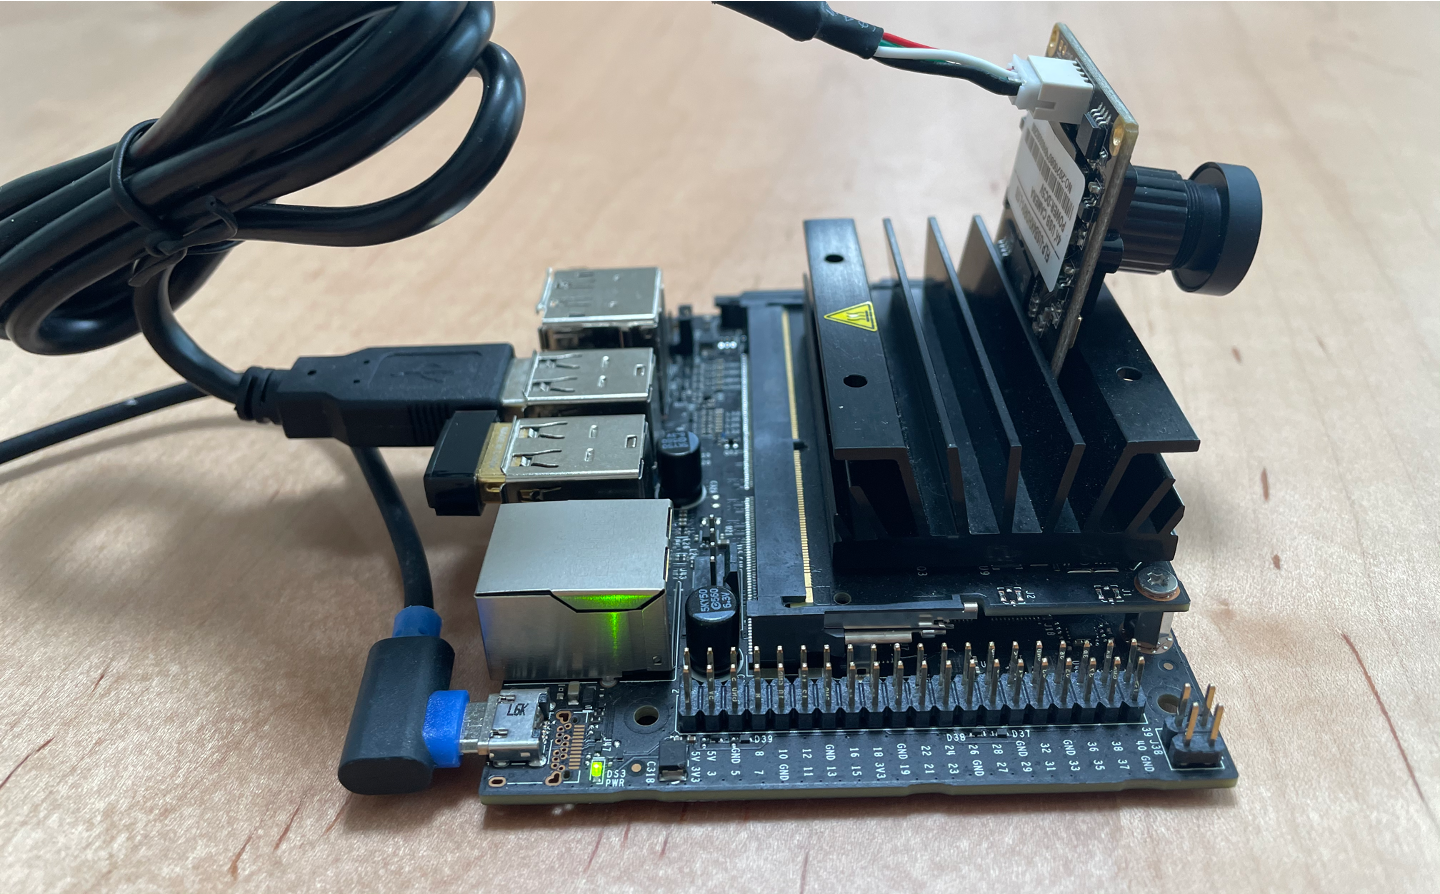
①カメラの接続
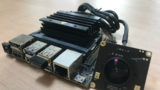
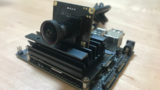
まずは、Jetson nanoにカメラを接続します。今回はUSB接続のカメラでしたので、Jetson nanoのUSB3.0ポートに挿すだけです😊
②dmesgの確認
カメラを接続したら「dmesg」コマンドを使って、認識されているか確認します。ちゃんと「HD USB CAMERA」として認識されていますね。
1
2
3
4
5
6
7
8
9
10
11
12
13
14
15
16
17
18
19
20
21
$ sudo dmesg
[ 1456.685941 ] usb 1 - 2.1 : new high - speed USB device number 4 using tegra - xusb
[ 1456.815674 ] usb 1 - 2.1 : New USB device found , idVendor = 32e4 , idProduct = 0317
[ 1456.815678 ] usb 1 - 2.1 : New USB device strings : Mfr = 1 , Product = 4 , SerialNumber = 3
[ 1456.815681 ] usb 1 - 2.1 : Product : HD USB CAMERA
[ 1456.815684 ] usb 1 - 2.1 : Manufacturer : 4K USB CAMERA
[ 1456.815687 ] usb 1 - 2.1 : SerialNumber : 01.00.00
[ 1456.841934 ] usb 1 - 2.1 : 3 : 1 : cannot get freq at ep 0x86
[ 1456.854381 ] usb 1 - 2.1 : 3 : 2 : cannot get freq at ep 0x86
[ 1456.866110 ] usb 1 - 2.1 : 3 : 3 : cannot get freq at ep 0x86
[ 1456.933796 ] usb 1 - 2.1 : Warning ! Unlikely big volume range ( = 4096 ) , cval -> res is probably wrong .
[ 1456.942554 ] usb 1 - 2.1 : [ 7 ] FU [ Mic Capture Volume ] ch = 1 , val = 0 / 4096 / 1
[ 1456.985662 ] uvcvideo : Found UVC 1.00 device HD USB CAMERA ( 32e4 : 0317 )
[ 1457.003023 ] uvcvideo 1 - 2.1 : 1.0 : Entity type for entity Extension 4 was not initialized !
[ 1457.011069 ] uvcvideo 1 - 2.1 : 1.0 : Entity type for entity Extension 3 was not initialized !
[ 1457.019096 ] uvcvideo 1 - 2.1 : 1.0 : Entity type for entity Processing 2 was not initialized !
[ 1457.027246 ] uvcvideo 1 - 2.1 : 1.0 : Entity type for entity Camera 1 was not initialized !
[ 1457.035521 ] input : HD USB CAMERA as / devices / 70090000.xusb / usb1 / 1 - 2 / 1 - 2.1 / 1 - 2.1 : 1.0 / input / input2
[ 1457.036055 ] usbcore : registered new interface driver uvcvideo
[ 1457.036058 ] USB Video Class driver ( 1.1.1 )
$
③lsusbで確認
次にlsusbで確認します。メーカ名の部分が空白ですが「32e4:0317」というのがカメラっぽいです(笑)
$ sudo lsusb
Bus 002 Device 002 : ID 0bda : 0411 Realtek Semiconductor Corp .
Bus 002 Device 001 : ID 1d6b : 0003 Linux Foundation 3.0 root hub
Bus 001 Device 003 : ID 0bda : 8179 Realtek Semiconductor Corp . RTL8188EUS 802.11n Wireless Network Adapter
Bus 001 Device 004 : ID 32e4 : 0317
Bus 001 Device 002 : ID 0bda : 5411 Realtek Semiconductor Corp .
Bus 001 Device 001 : ID 1d6b : 0002 Linux Foundation 2.0 root hub
$
④v4l2で確認
次に、v4l2ドライバーからカメラが認識できているか「v4l2-ctl –list-devices」コマンドで確認します。以下のように「/dev/video0」で認識されていることが確認できます。
$ v4l2 - ctl -- list - devices
HD USB CAMERA ( usb - 70090000.xusb - 2.1 ) :
/ dev / video0
$
⑤利用可能なフォーマットと解像度の確認
次に、「v4l2-ctl –list-formats-ext」コマンドを使って、カメラで利用可能なフォーマットと解像度を確認します。私が使ったカメラはMJPGとYUYVフォーマットに対応しており、複数の解像度に対応していることが確認できます。この情報は後で使うので、テキストエディタなどにメモしておきましょう。
1
2
3
4
5
6
7
8
9
10
11
12
13
14
15
16
17
18
19
20
21
22
23
24
25
26
27
28
29
30
31
32
33
34
35
$ v4l2 - ctl -- list - formats - ext
ioctl : VIDIOC_ENUM_FMT
Index : 0
Type : Video Capture
Pixel Format : 'MJPG' ( compressed )
Name : Motion - JPEG
Size : Discrete 3840x2160
Interval : Discrete 0.033s ( 30.000 fps )
Interval : Discrete 0.040s ( 25.000 fps )
Interval : Discrete 0.050s ( 20.000 fps )
Interval : Discrete 0.067s ( 15.000 fps )
Interval : Discrete 0.100s ( 10.000 fps )
Interval : Discrete 0.200s ( 5.000 fps )
・・・省略・・・
Index : 1
Type : Video Capture
Pixel Format : 'YUYV'
Name : YUYV 4 : 2 : 2
・・・省略・・・
Size : Discrete 640x480
Interval : Discrete 0.033s ( 30.000 fps )
Interval : Discrete 0.040s ( 25.000 fps )
Interval : Discrete 0.050s ( 20.000 fps )
Interval : Discrete 0.067s ( 15.000 fps )
Interval : Discrete 0.100s ( 10.000 fps )
Interval : Discrete 0.200s ( 5.000 fps )
Size : Discrete 320x240
Interval : Discrete 0.033s ( 30.000 fps )
Interval : Discrete 0.040s ( 25.000 fps )
Interval : Discrete 0.050s ( 20.000 fps )
Interval : Discrete 0.067s ( 15.000 fps )
Interval : Discrete 0.100s ( 10.000 fps )
Interval : Discrete 0.200s ( 5.000 fps )
$
⑥カメラ画像の確認
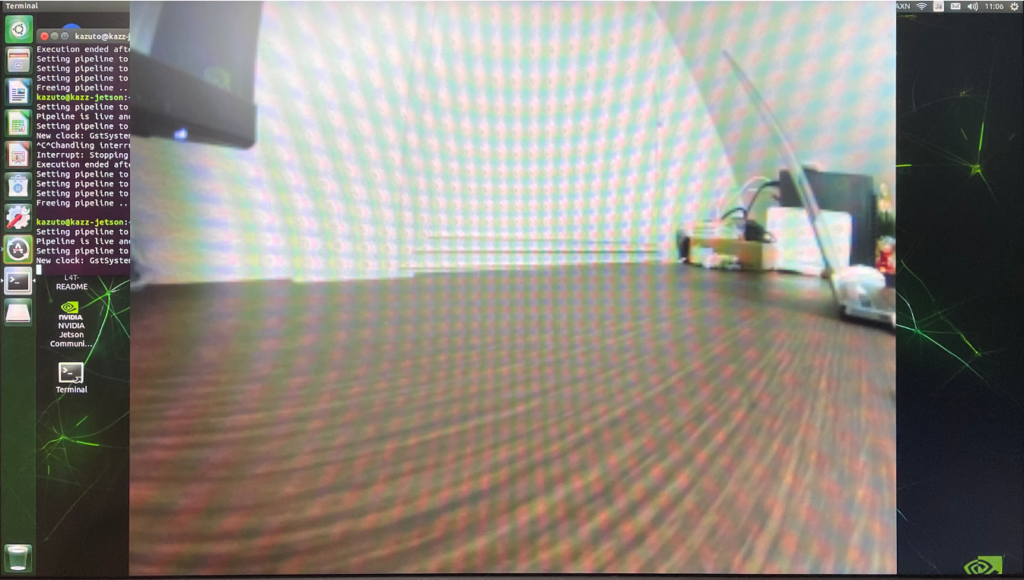
それでは、接続したカメラの画像を確認してみましょう!もっと簡単に確認する事もできますが、今回はGstreamerの動作確認も兼ねてGstreamerを使って画面に表示してみます。
$ gst - launch - 1.0 v4l2src device = / dev / video0 ! video / x - raw , width = 320 , height = 240 , framerate = 30 / 1 ! nvvidconv ! 'video/x-raw(memory:NVMM),format=NV12' ! nvoverlaysink
うまく行くと以下のように、画面にカメラの映像が表示されます。
以上で、カメラの設定は完了です。
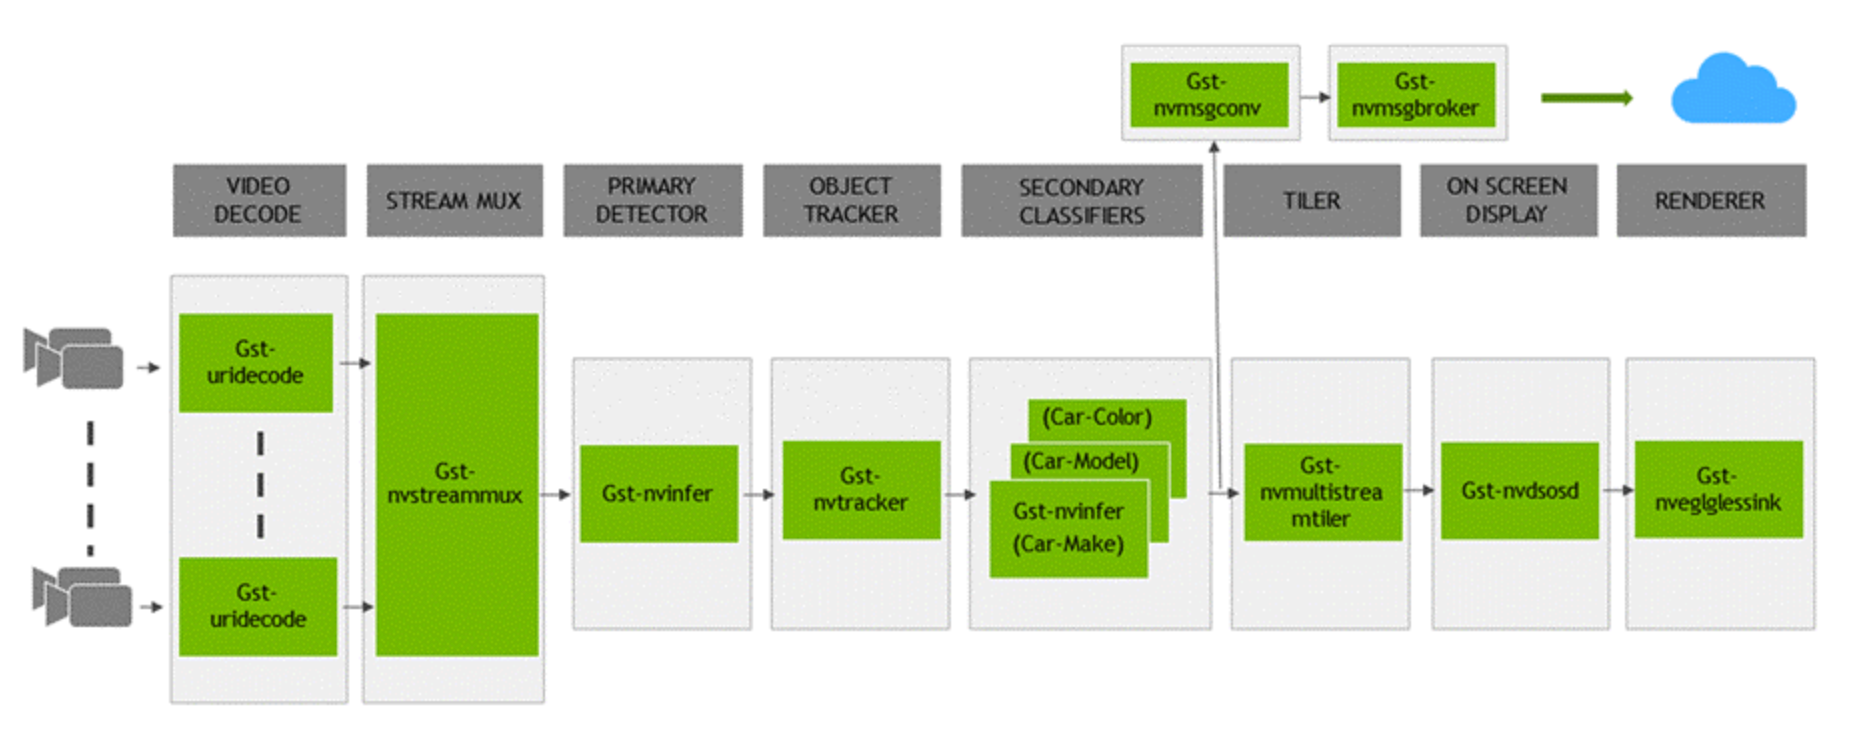
DeepStreamアプリによる物体検出 ここからは、DeepStreamのアプリを使って物体検出を行なっていきます。DeepStreamのアプリは以下のような構成になっており、Gstreamerのパイプラインを組み合せて作られています。
この図は、後の設定ファイルの内容を理解するのに、非常に重要ですので、頭の片隅に入れておきましょう。そして、この図の中の「PRIMARY DETECTOR」が物体検出を行う処理であり「Gst-nvinfer」プラグインによって実装されています。
出典 https://docs.nvidia.com/metropolis/deepstream/dev-guide/text/DS_ref_app_deepstream.html
①作業用ディレクトリの作成
まずは、今回の作業用ディレクトリを作成しましょう。今回は「deepstream」という名前のディレクトリを作成します。
②サンプルモデルのコピー
次に、DeepStream SDKに付属している学習済モデル「Primary_Detector_Nano」を作業ディレクトリにコピーします。ちにみに、DeepSteamの各種ファイルは「/opt/nvidia/deepstream/deepstream-5.0/」に格納されています。
$ cd / opt / nvidia / deepstream / deepstream - 5.0 / samples / models
$ cp - r Primary_Detector_Nano ~ / deepstream /
③Gst-nvinfer設定ファイルのコピー
次に、Gst-nvinferプラグイン用の設定ファイル「config_infer_primary_nano.txt」をサンプルディレクトリからコピーします。
$ cd / opt / nvidia / deepstream / deepstream - 5.0 / samples / configs / deepstream - app
$ cp config_infer_primary_nano . txt ~ / deepstream /
④Gst-nvinfer設定ファイルの編集
次に、作業ディレクトリに戻り「config_infer_primary_nano.txt」の63〜66行目の「Primary_Detector_Nano」のファイルパスを今回のディレクトリ構成に合わせて書き換えます。
$ cd ~ / deepstream
$ vi config_infer_primary_nano . txt
「config_infer_primary_nano.txt」の63〜66行目の書き換え後は、以下のようになります。
model - file = . / Primary_Detector_Nano / resnet10 . caffemodel
proto - file = . / Primary_Detector_Nano / resnet10 . prototxt
model - engine - file = . / Primary_Detector_Nano / resnet10 . caffemodel_b8_gpu0_fp16 . engine
labelfile - path = . / Primary_Detector_Nano / labels . txt
⑤アプリの設定ファイルの作成
次に、DeepStreamアプリ用の設定ファイル「test_disp.txt」を作成します。
「test_disp.txt」の記述内容は、以下をコピペして下さい。
1
2
3
4
5
6
7
8
9
10
11
12
13
14
15
16
17
18
19
20
21
22
23
24
25
26
27
28
29
30
31
32
33
34
35
36
37
38
39
40
41
42
43
44
45
46
47
48
49
50
51
52
53
54
55
56
57
58
59
60
61
62
63
64
65
66
67
68
69
70
71
72
73
74
75
76
77
[ application ]
enable - perf - measurement = 1
perf - measurement - interval - sec = 5
[ tiled - display ]
enable = 1
rows = 1
columns = 1
width = 640
height = 480
gpu - id = 0
nvbuf - memory - type = 0
[ source0 ]
enable = 1
type = 3 #1=CameraV4L2 2=URI 3=MultiURI 4=RTSP
uri = file : ///opt/nvidia/deepstream/deepstream-5.0/samples/streams/sample_1080p_h264.mp4
num - sources = 1
gpu - id = 0
cudadec - memtype = 0
[ sink0 ]
enable = 1
type = 2 #1=FakeSink 2=EglSink 3=File
sync = 1
source - id = 0
gpu - id = 0
qos = 0
nvbuf - memory - type = 0
overlay - id = 1
[ osd ]
enable = 1
gpu - id = 0
border - width = 1
text - size = 15
text - color = 1 ; 1 ; 1 ; 1 ;
text - bg - color = 0.3 ; 0.3 ; 0.3 ; 1
font = Serif
show - clock = 0
clock - x - offset = 800
clock - y - offset = 820
clock - text - size = 12
clock - color = 1 ; 0 ; 0 ; 0
nvbuf - memory - type = 0
[ streammux ]
gpu - id = 0
live - source = 0
batch - size = 8
batched - push - timeout = 40000
width = 640
height = 480
enable - padding = 0
nvbuf - memory - type = 0
[ primary - gie ]
enable = 1
gpu - id = 0
model - engine - file = . / resnet10 . caffemodel_b8_gpu0_fp16 . engine
batch - size = 8
#Required by the app for OSD, not a plugin property
bbox - border - color0 = 1 ; 0 ; 0 ; 1
bbox - border - color1 = 0 ; 1 ; 1 ; 1
bbox - border - color2 = 0 ; 0 ; 1 ; 1
bbox - border - color3 = 0 ; 1 ; 0 ; 1
interval = 4
gie - unique - id = 1
nvbuf - memory - type = 0
config - file = config_infer_primary_nano . txt
[ tracker ]
enable = 0
[ tests ]
file - loop = 0
このファイルは非常に重要なので、ポイントを解説しておきます。まず5〜12行目の設定が、画面に何個の映像の表示を行うかの設定です。今回は1つあれば十分なので、rowsもcolumnsも1を設定します。また、画面の解像度も設定します。
14〜20行目が入力の設定です。まずはDeepStreamSDKに付属のサンプルmp4ファイルを指定しています。また、22〜30行目は、出力の設定です。まずは、画面に表示してみます。
そして、57〜70行目が本題の物体検出を行うGst-nvinferの設定です。ここのポイントは、上で編集した「config_infer_primary_nano.txt」を指定していることです。また、60行目のmodel-engine-fileの設定については、ファイルは存在しなくてOKです。存在しない場合はDeepStreamアプリが実行時に自動的に作成してくれます。
⑥アプリの実行
上の手順通りに行うと、作業フォルダ内は以下のようになっていると思います。
cd ~ / deepstream /
$ ls - l
total 16
drwxr - xr - x 2 test test 4096 12 月 6 12 : 05 Primary_Detector_Nano
- rw - r -- r -- 1 test test 4157 12 月 6 12 : 04 config_infer_primary_nano . txt
- rw - r -- r -- 1 test test 1577 12 月 6 11 : 58 test_disp . txt
$
それでは、DeepStreamアプリを実行してみましょう❗️実行方法は、以下の通りです。上で作成した設定ファイルを「-c」オプションで指定して実行します。
$ deepstream - app - c test_disp . txt
・・・省略・・・
$
アプリが動き出すと「Trying to create engine from model files」と表示され、学習済モデルからmodel-engine-fileの作成が開始されます。model-engine-fileの作成が完了すると、以下のように画面に動画が表示され、物体が検出できている様子が確認できます‼️
うまくいきましたか⁉️これの画面が出ると少し感動しますね‼️
DeepStreamアプリで色々試す ここからは、DeepStreamアプリの設定ファイルを変更して、色々試してみたいと思います。
①ファイルに出力
1つ目は、出力結果を動画ファイルに出力する方法です。アプリの設定ファイルの[sink0]の部分を以下のように書き換えます。ポイントはtypeに「3」を設定して、container、codec、output-fileを指定する事です。
[ sink0 ]
enable = 1
type = 3 #1=FakeSink 2=EglSink 3=File
sync = 1
source - id = 0
gpu - id = 0
qos = 0
nvbuf - memory - type = 0
overlay - id = 1
container = 1 #1=mp4,2=mkv
codec = 1 #1=h264,2=h265
output - file = . / out . mp4
アプリを実行すると、out.mp4が作成されます。
$ deepstream - app - c test_file . txt
・・・省略・・・
$ ls - l out . mp4
- rw - rw - r -- 1 test test 8887215 12 月 6 13 : 41 out . mp4
out.mp4を再生してみると、以下のように物体検出の様子が記録されています。
②ネットワーク経由で送信
2つ目は、出力結果をネットワーク経由で送信する方法です。アプリの設定ファイルの[sink0]の部分を以下のように書き換えます。ポイントは、typeに「4」を設定して、rtsp-portとudp-portを指定する事です。また、一番下の[tests]の部分でfile-loop=1にしておくと、入力ファイルをループ再生してくれるので便利です。
1
2
3
4
5
6
7
8
9
10
11
12
13
14
15
16
17
[ sink0 ]
enable = 1
type = 4 #1=FakeSink 2=EglSink 3=File 4=rstp
sync = 0
source - id = 0
gpu - id = 0
qos = 0
nvbuf - memory - type = 0
overlay - id = 1
bitrate = 2000000
container = 1 #1=mp4,2=mkv
codec = 1 #1=h264,2=h265
rtsp - port = 8554
udp - port = 5400
[ tests ]
file - loop = 1
アプリを実行すると、「rtsp://localhost:8554/ds-test」というURLが表示されます。
$ deepstream - app - c test_stream . txt
・・・省略・・・
* * * DeepStream : Launched RTSP Streaming at rtsp : //localhost:8554/ds-test ***
・・・省略・・・
$
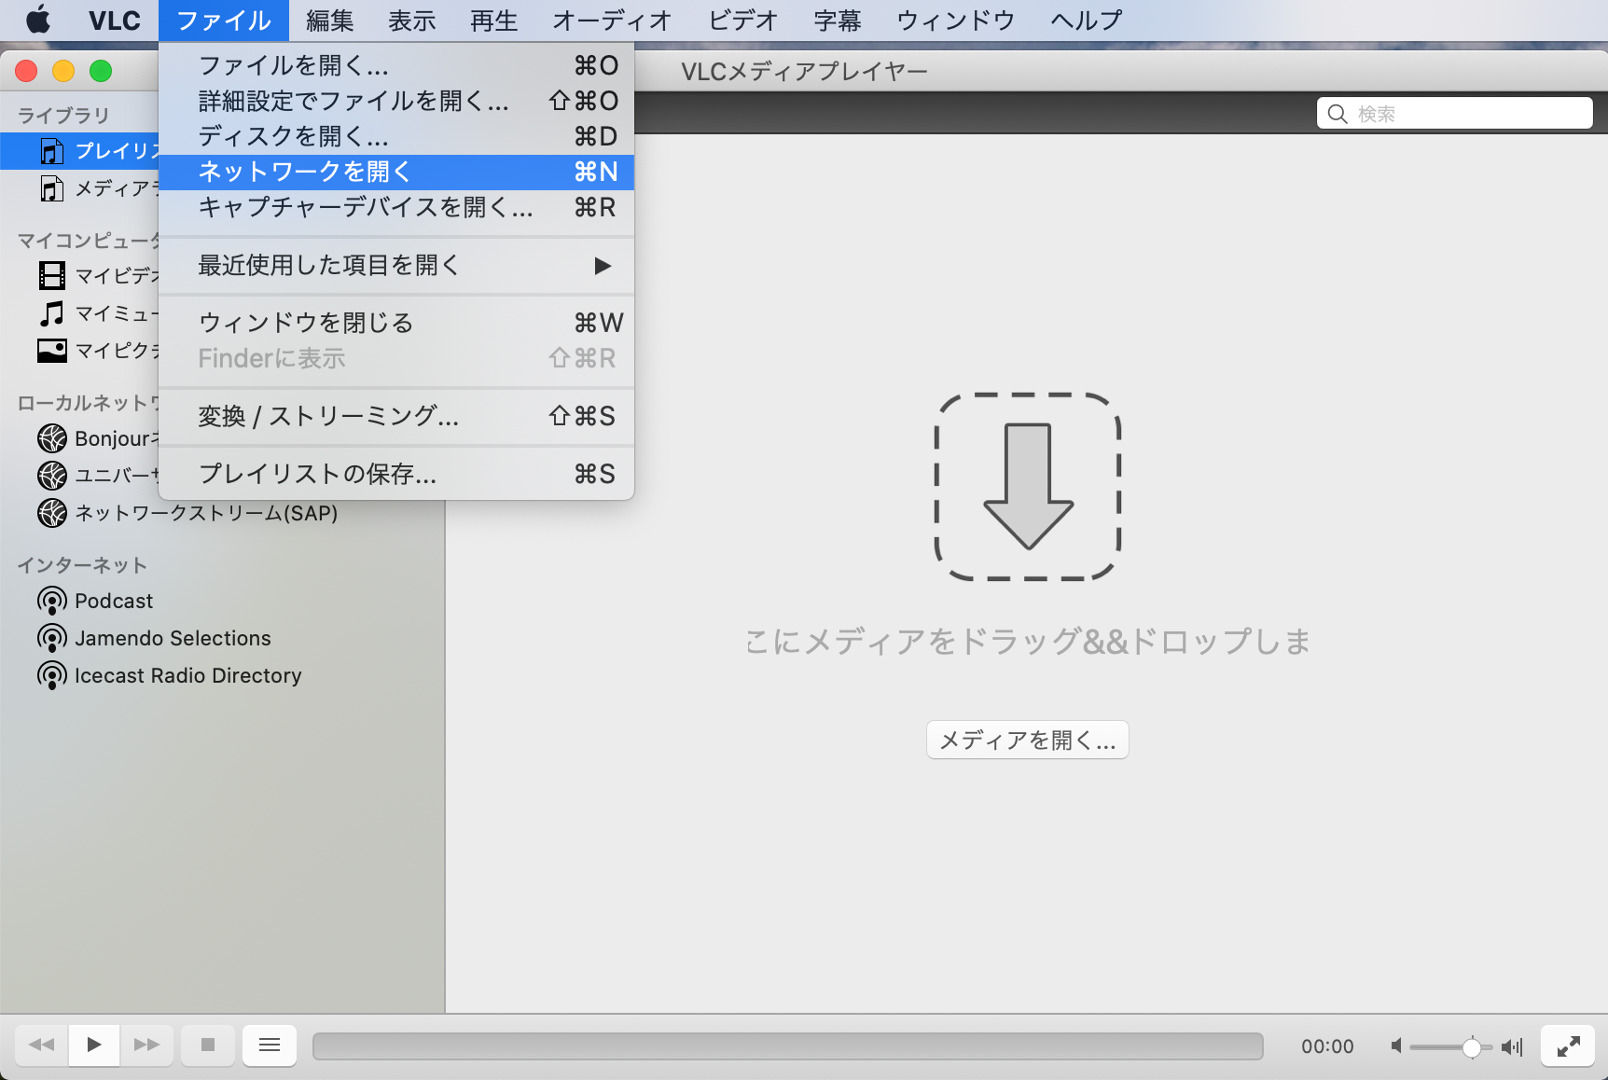
次にPCでVLC media player を起動し、「ファイル」→「ネットワークを開く」を選択します。
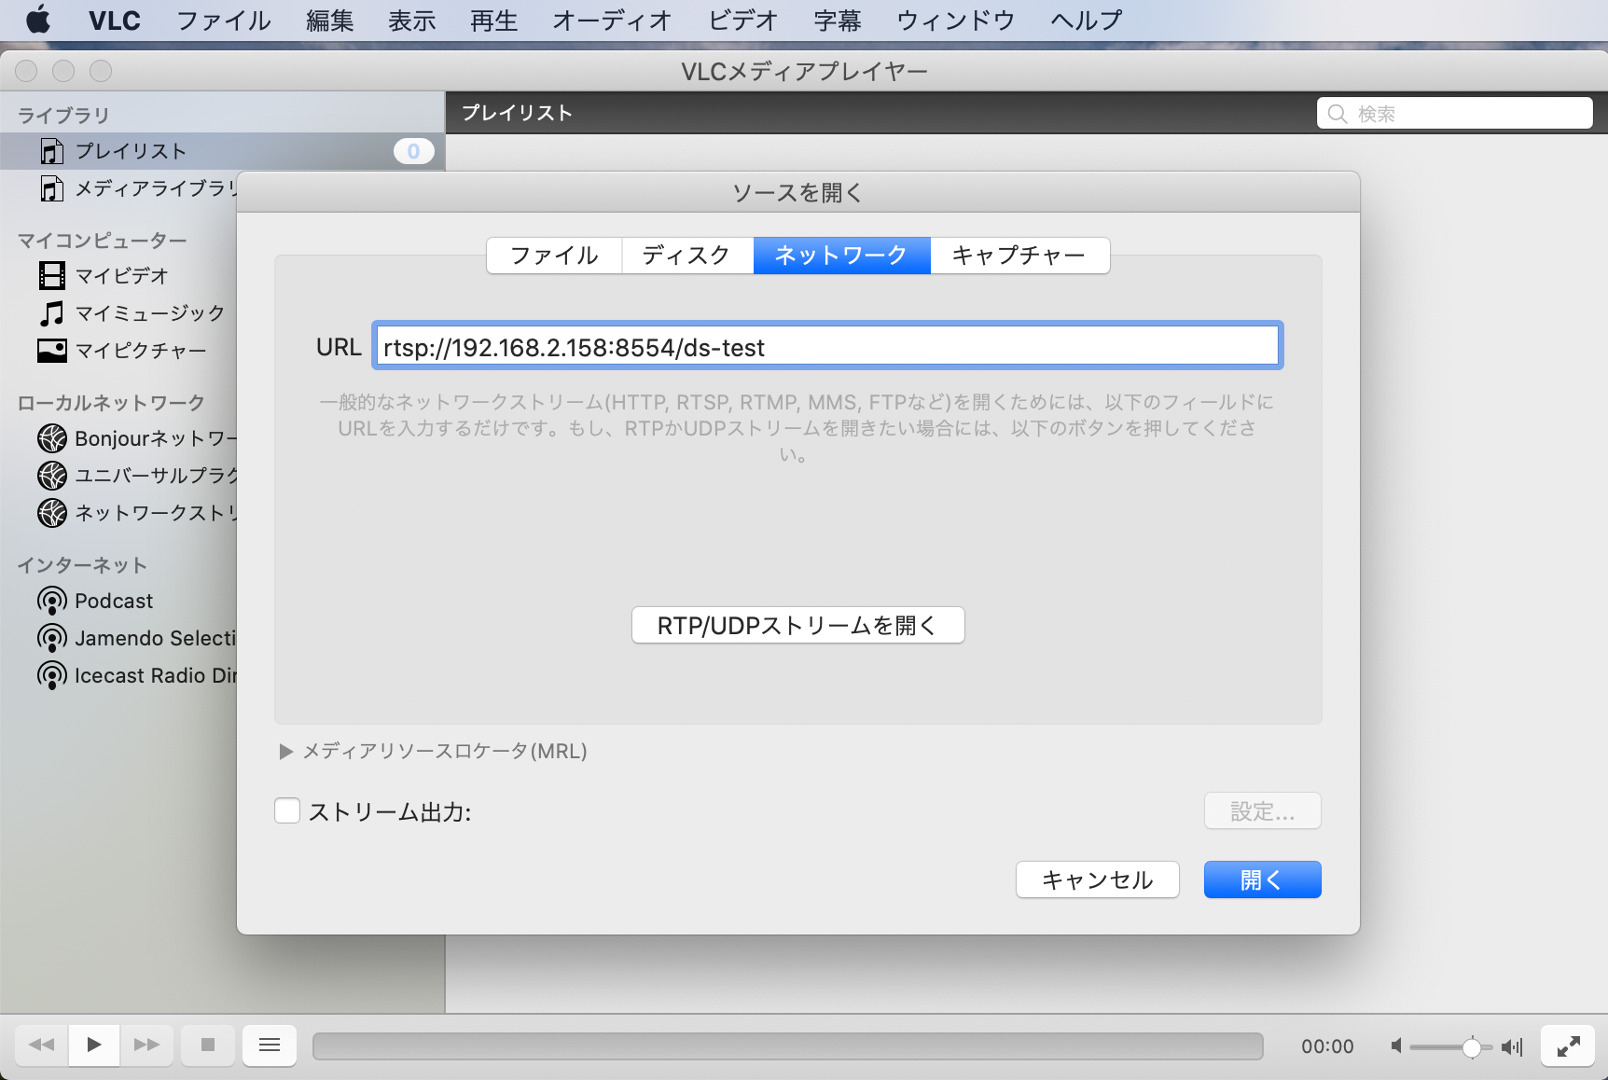
URLの入力欄で「rtsp://<Jetson nanoのIPアドレス>:8554/ds-test」と入力して「開く」ボタンをクリックします。
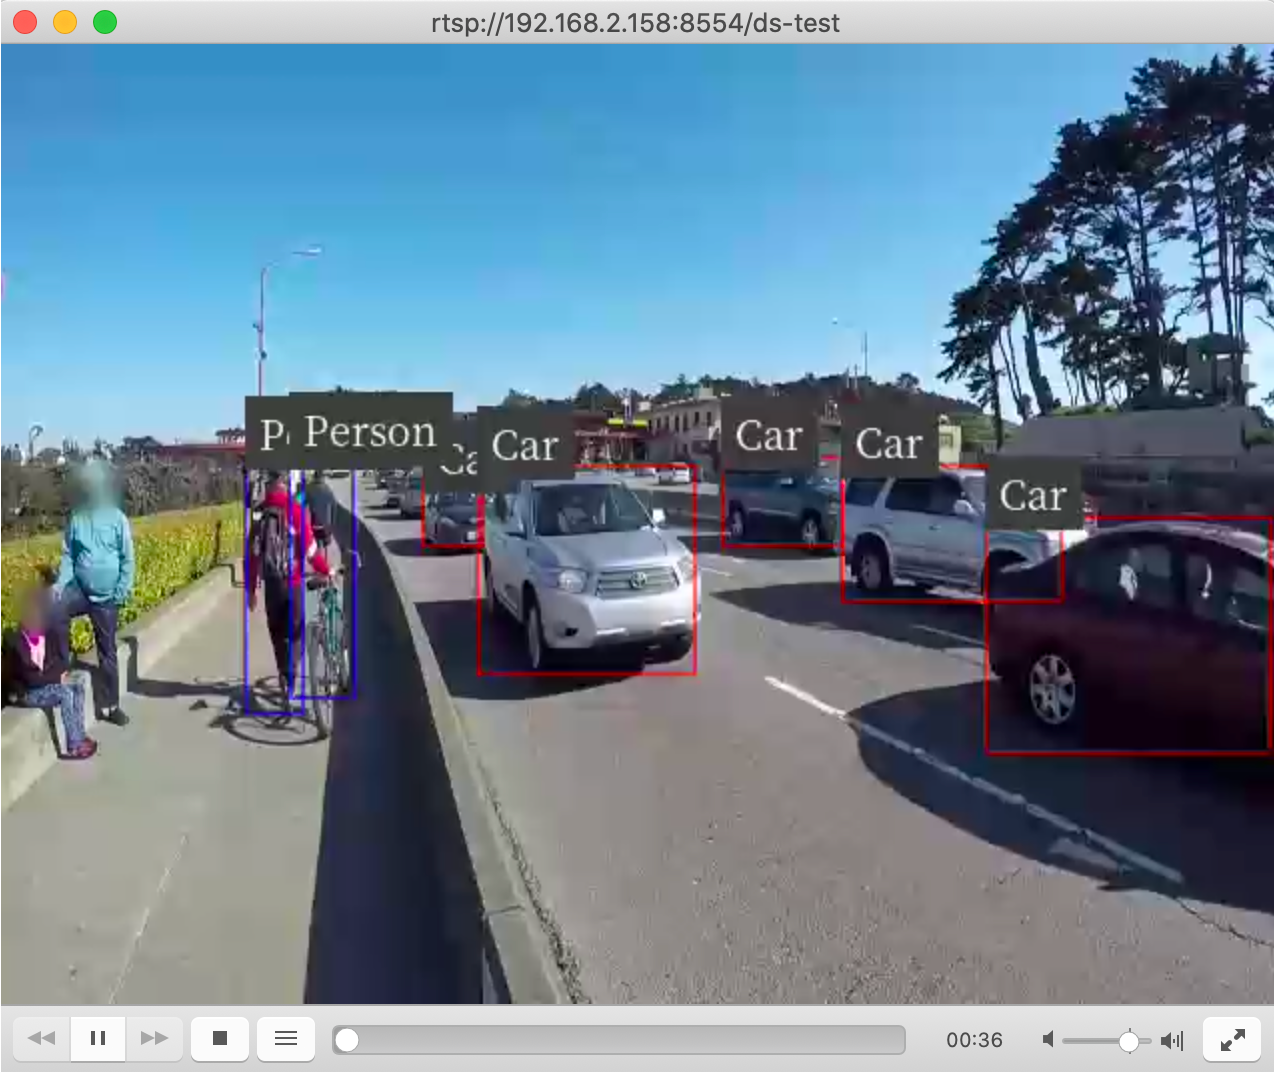
すると、以下のように物体検出結果の動画がネットワーク経由で確認できます。Jetson nanoをヘッドレスで利用している場合には便利ですね。
③カメラを入力にする
3つ目は、Jetson nanoに接続したカメラを入力にしてみます。アプリの設定ファイルの[source0]の部分を以下のように書き換えます。ポイントは、typeに「1」を設定して、camera-v4l2-dev-node、camera-width、camera-height、camera-fps-nを指定する事です。ちなみに、DeepStreamアプリではMJPG形式での読み込みはサポートしていないようなので、上で調べたYUYV形式で対応している解像度とFPSを設定する必要があります。
[ source0 ]
enable = 1
type = 1 #1=CameraV4L2 2=URI 3=MultiURI 4=RTSP
num - sources = 1
gpu - id = 0
cudadec - memtype = 0
camera - v4l2 - dev - node = 0 #/dev/video<num>
camera - width = 640
camera - height = 480
camera - fps - n = 30
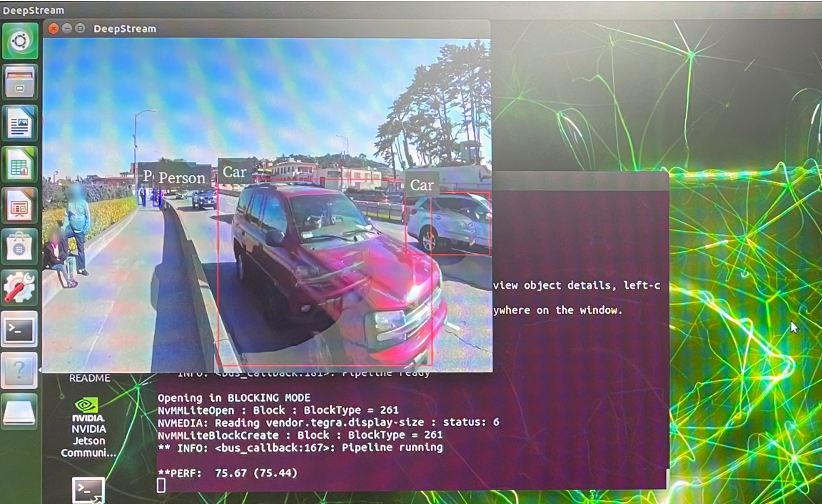
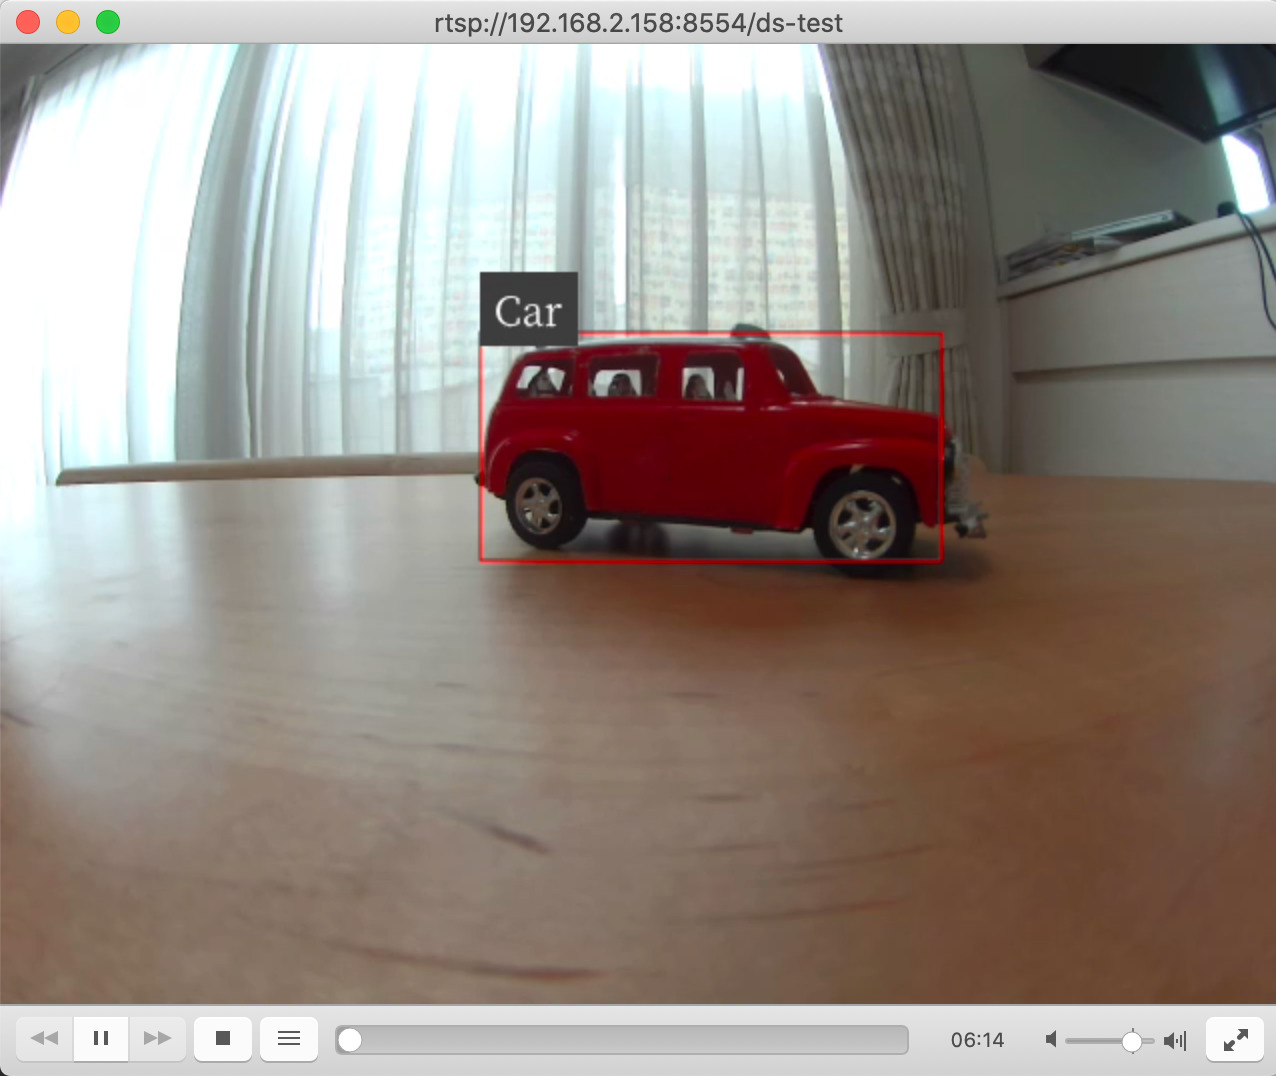
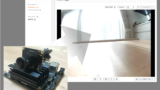
実行すると以下のように、カメラを入力に物体検出を試すことができます。ちゃんと、車のおもちゃもCarとして認識されていますね!!
以上でDeepStreamアプリで色々試すは完了です。
おわりに 今回はJetson nanoに接続したカメラの動作確認を行なった後に、DeepStream SDKに付属のモデルを使って物体検出をやってみました。また、DeepStreamアプリの設定ファイルを色々変更して、出力形式や入力形式を変更することをやりました。次回は、いよいよ最終回。オリジナルのモデルを使った物体検出を行なってみたいと思います。
第1回:IBM Cloud Annotationsを用いたアノテーション 第2回:Google Colabを用いたモデルの学習 第3回:Jetson nanoの環境構築 第4回:DeepStreamアプリを使いこなす 第5回:学習モデルの変換と物体検出 ←次回
関連記事
コメント